
If your USB drive shows less storage capacity than the actual size. This could be due to several reasons. USB drives might have multiple partitions. Seeing a USB unknown capacity error on your flash drive would be a panic situation if not familiar with how to fix it. Don’t know how to fix a flash drive with multiple partitions then this article would be a game changer for you.
Someday you plug in your USB drive with your laptop and see multiple drives on Windows file explore. This multiple USB partition thing could not be solved only by just formatting the drive with Windows File Explorer.
Suppose you see two partitions of your USB drive; you can only format partitions individually and can’t delete and merge to get full USB capacity. Also, if your USB drive consists of more than one partition, only the first partition would be visible and accessible in the PC file explorer. So, merging multiple partitions of flash drives would give you full storage capacity.
Methods to Fix USB Drive Showing Two Partitions
There are various methods to join two or more partitions of your flash drive into one with full capacity. You might need standalone software third-party software if the problem is severed, otherwise using Windows PowerShell will convert multiple USB drive partitions into usable ones. Below are both methods that you can choose which suits you the best.
Make a backup of your data from all partitions and copy all your necessary files and folders because it may get deleted in the fixation process.
Method 1: Fix Fix USB Drive Showing Two Partitions Using Command Prompt
Here are the steps to follow:
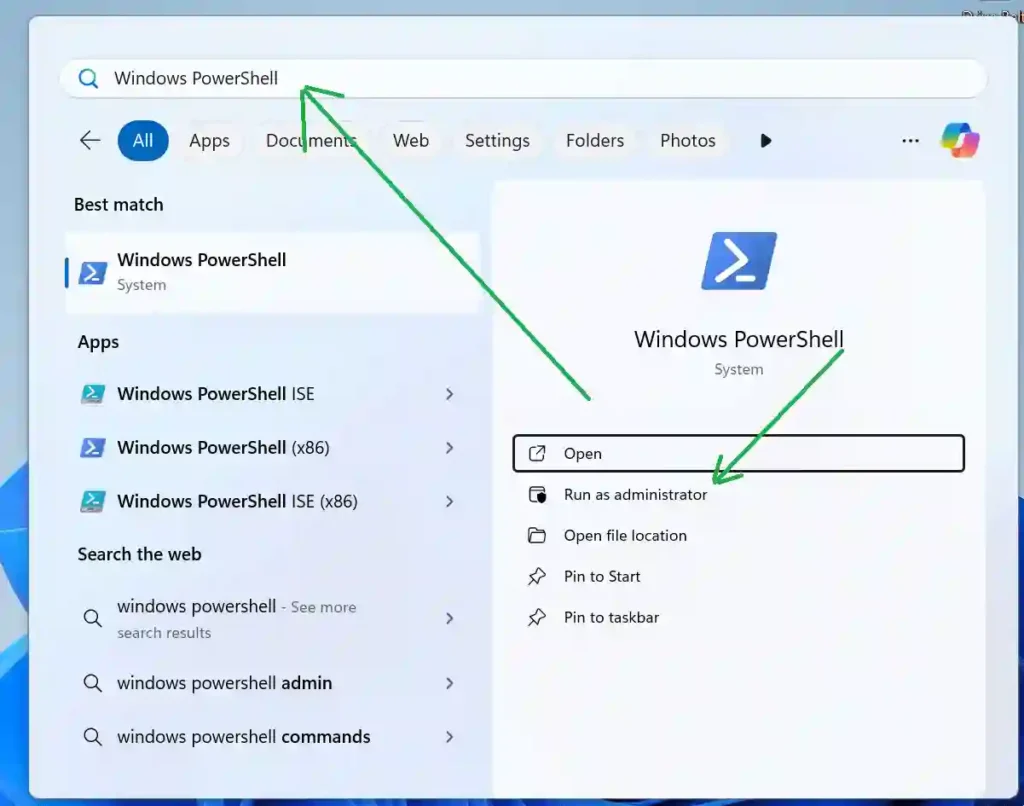
- Go to the start menu on your PC or laptop search, Windows PowerShell and open it with administrator rights.
- Type “diskpart” after C:\WINDOWS\system32> and press Enter
- Type “list disk” after DISKPART> will show you the number of disks installed on your PC with their details such as disk number, status, size, and free storage
- Type the “select disk” with the appropriate number that you want to fix. For example, “select disk 1”
- Enter the command “clean”. This will erase all the data on your flash drive and a “DiskPart succeeded in cleaning the disk” message will show up.
- Then writing “create partition primary” will create one USB drive partition with full capacity and a “DiskPart succeeded in creating the specified partition” message show up
- Exit the Windows PowerShell and finish the job is done. You should see the flash drive restored to normal.

Method 2: Third-Party Tool USB Drives Multiple Partitions and Create One
Well, if you don’t know how to use a command prompt then you may rely on third-party software such as MiniTool Partition Wizard. It has a demo version that you can try for testing and making purchase decisions. MiniTool Partition Wizard can run on Windows versions from Windows XP/7/8/10 to Windows 11 used in this tutorial. Here are the steps to follow:
- Download the MiniTool Partition Wizard from the official website
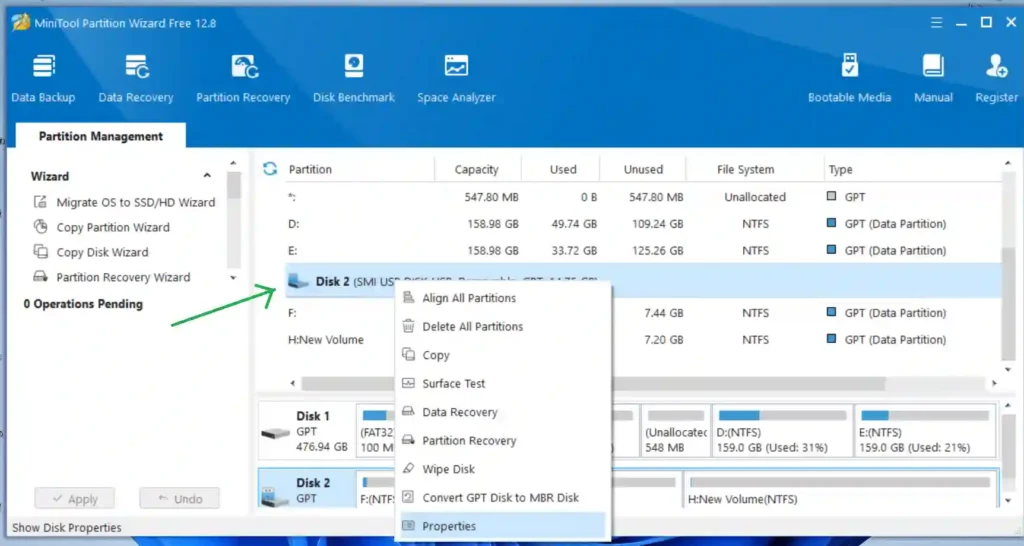
- Open the MiniTool Partition Wizard and locate the disk that you want to fix
- Navigate to the removable USB storage and check right click on it and check the properties
- Right-click on the removable USB drive and delete all the partitions
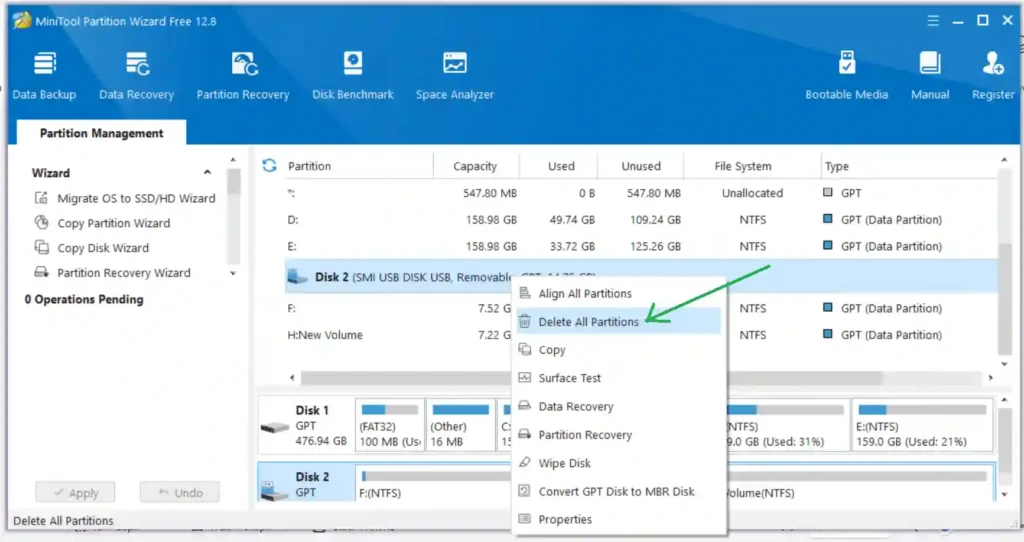
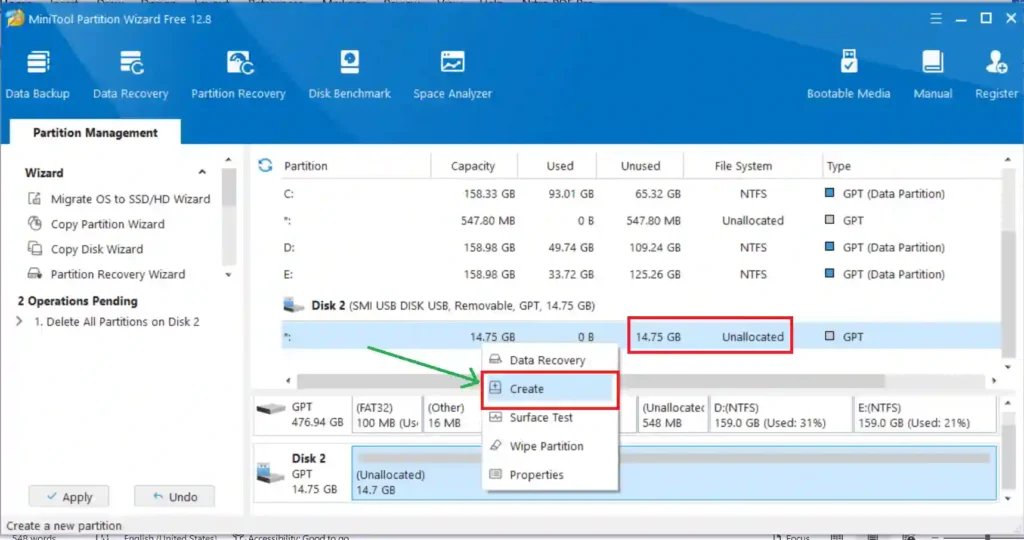
- Deleting all the partitions on the USB drive will create complete unallocated space on your flash drive
- Now, right-click on the unallocated space and choose the Create primary partition option
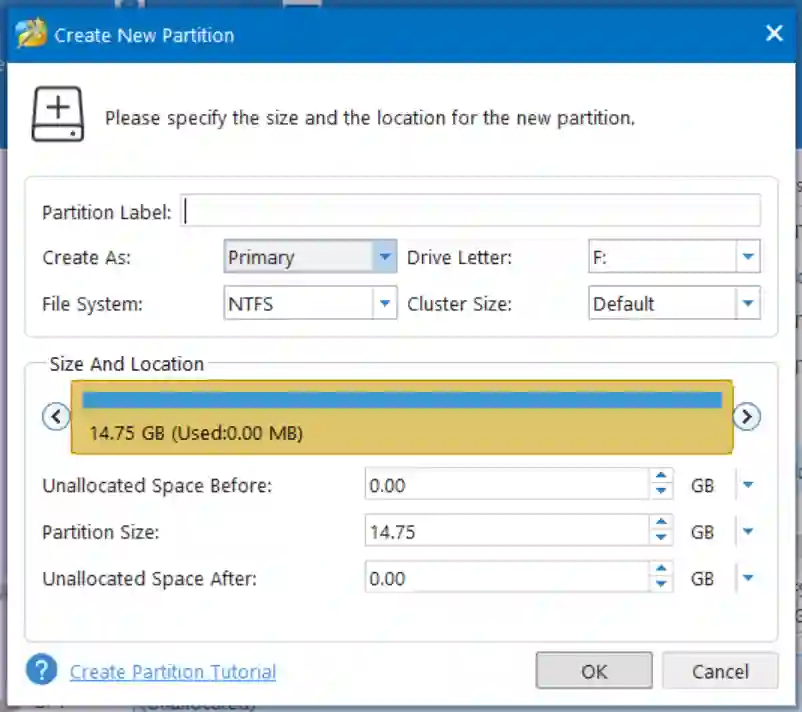
- Name your flash drive, verify the drive letter, verify the USB full capacity and click on the OK on the dialogue box
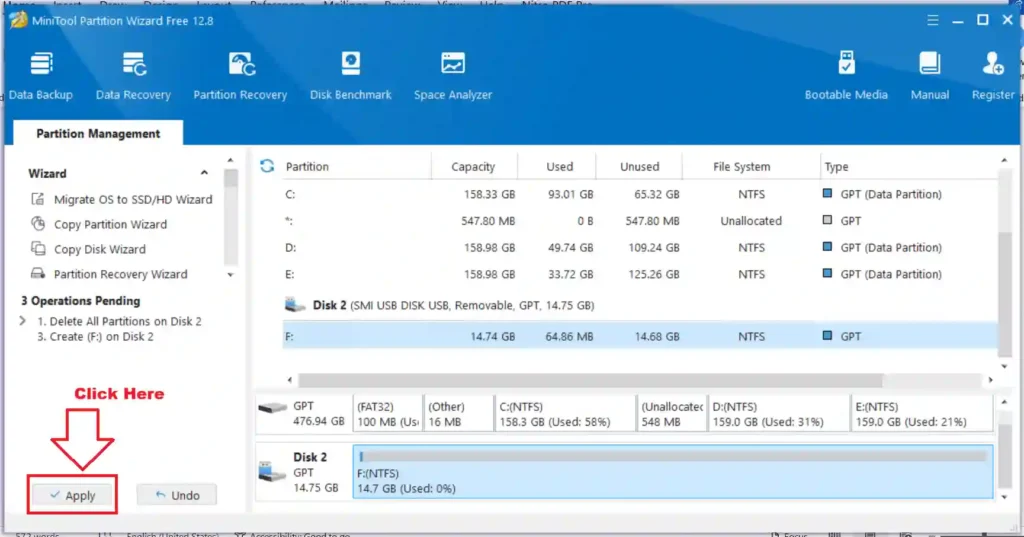
- Now, click on the Apply button on the bottom left corner
- Read the warning dialogue box and click YES
- It will initiate the fixation process until you see the SUCCESSFUL dialogue box
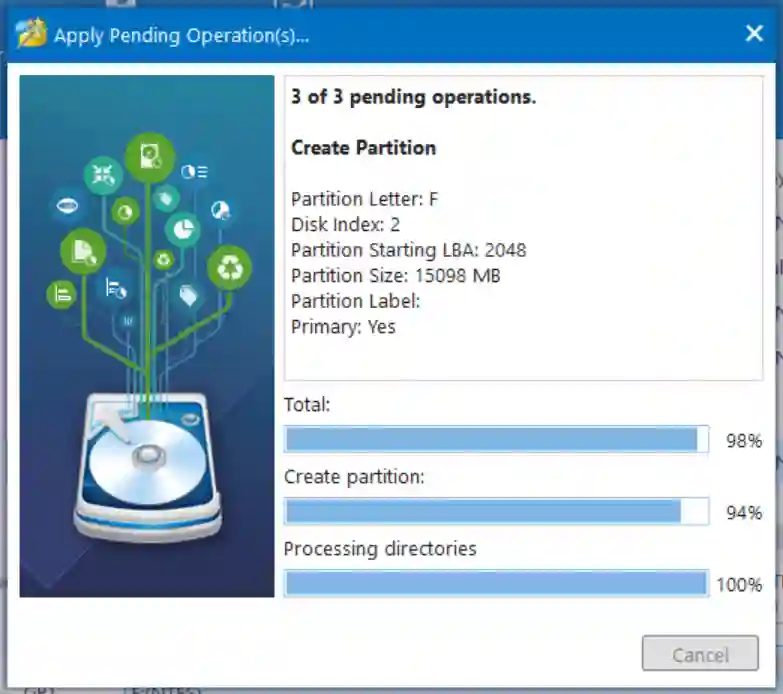
- Click on the OK button on the “Successful” dialogue box and close the MiniTool partition Wizard. You should see the flash drive restored to complete storage.
Why USB drive Showing More Partitions?
There are various reasons your removable flash drive might have two or more partitions:
- The USB manufacturer may create multiple partitions such as plug-and-play drivers or software to work with specific equipment or systems.
- To run cross-platform software or operation systems such as iOS on Windows or standalone Windows on the removable device
- You might have created additional partitions in past for making a bootable USB for Windows installation on your dead laptop
- Your flash drive may be corrupted due to malware and viruses that might create partitions of the flash drive
Wrapping Up
You shouldn’t worry about if your flash drive is showing two or more partitions on the Windows Explorer. However, you can’t fix it right if you don’t know the proper procedure. This article gives you complete insight into how to fix the USB drive showing two partitions. Above, you can see that both methods solve it correctly with data loss. A Samsung 16GB USB drive was used to create this tutorial and both methods are one hundred percent working and tested.